
- Native frontend tool of Oracle.
- Supports PL/SQL coding.
- Supports communication with database.
- Supports all database objects of SQL and PL/SQL ( Tables, Views, Synonym, Sequence, Triggers, Sub programs)
- Supports to view and define database objects from forms environment.
- Supports to share properties of controls using visual attributes and property classes.
- Supports OOPS features.
- Supports to share application with multiple users and multiple platforms.
It consists of three components
Oracle Forms
Used to develop user friendly application screens for data manipulations and retrieval purpose.
Oracle Reports
Used to represent information for read only purpose in a user friendly format.
Oracle Graphics
Used to represent the information in char formar with X and Y co-ordinates.
Forms 10g
Supports to manipulate data or retrieve data available in RDBMS.
- Interfaces in forms
- Object Navigator ( F3 )
- Layout Editor ( F2 )
- Property pallete ( F4 )
- PL/SQL Editor ( F11 )
- Menu Editor
- Wizards
Form Components
There are two important forms components.
- Blocks
- Canvas
- Blocks
There are two types of blocks
- Base table block
- Control block
- Base table block
- Control block
Control blocks are created manually.
2) Canvas
Used to hold block items. It is a container which can hold more than one block on it.
Canvas can be created through layout wizard or manually.
Note
- The default type of canvas is content canvas.
- Default type of item is text item.
- Text item: It is an editable control, used to represent column of a table.
- At least one content or tab canvas must be there to run the application.
- At least one editable item must be available to run the application.
- Whenever base table block is created in a form, it automatically frames an internal insert, update, delete and select statements.
| ctrl + s | save the FMB file |
| ctrl + t | compiles the FMB file and gives FMX file |
| ctrl + r | Runs FMX file ( Gives the final output ) |
| F8 | Execute the query ( used to retrieve the data from table |
Wizards
Data block wizard -- Used for creating datablock.
Layout wizard -- used for creating Canvas.
LOV wizard -- used for creating list of values
Chart wizard -- used for creating chart.
Report wizard -- used for creating wizard.
Create your first form using wizard
Form Builder Tool
Open the "Form Builder" tool.
Welcome window
You will get the ‘Welcome to the Form Builder’ window.
Use the data Block Wizard, ( Tools
You will get ‘welcome to the the data block wizard’
We are done with datablock wizard , You will get ‘welcome to layout wizard’
We are done with layout wizard
Go to File -
Important is to observe the object navigator ( Press F3 )
You can see under forms your form name i.e. EMP_FORM
Under form, data block is created i.e. EMP ( Data block refers to table )
Under data block, i.e. you find Item ( Item refers to columns in the table )
Under canvases, you can see a canvas
Under Canvas, you can see the frame
Understand hierarchy. It is simple.
Now, Compile the form.
In the Menu, Go to Program -
In your desktop, in your folder MY_FORMS , Observe .fmx file is generated.
Note:
When we compile fmb file, fmx file is generated.
To run the form, start the listener / Start OC4J listener
Now, Run the form
Click on Run Form Icon.
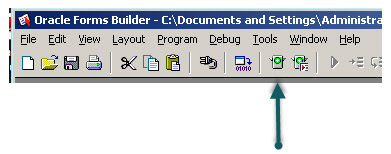
It will prompt to install Jinitiator, Install it.
Your Form is opened in the browser.
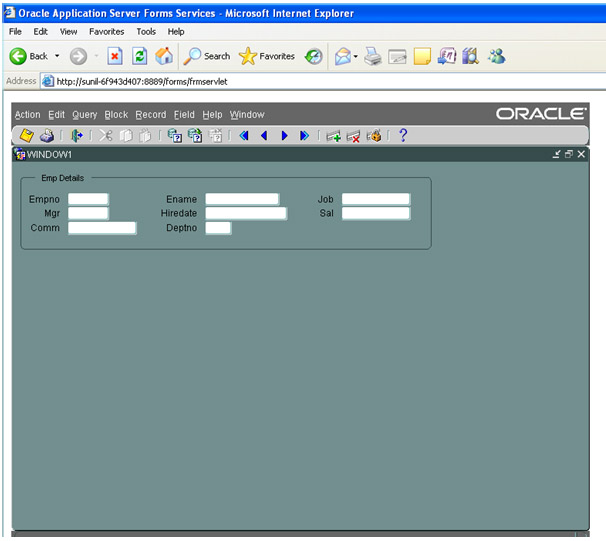
Now, Enter values in few fields like empno, ename ,sal , deptno, click on save.
You get a message, Transaction complete: 1 record applied and saved.
Now check your EMP table in the database, you can see the new row is inserted.

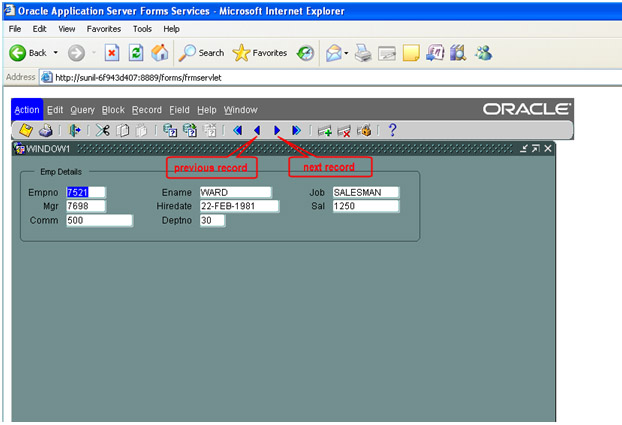
To look at all the rows in the emp table, click on execute query
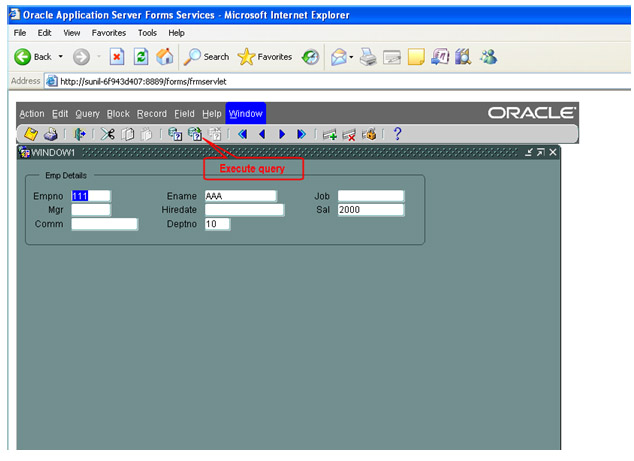
To look at the next row click on next record.
To look at previous row click on previous record button.
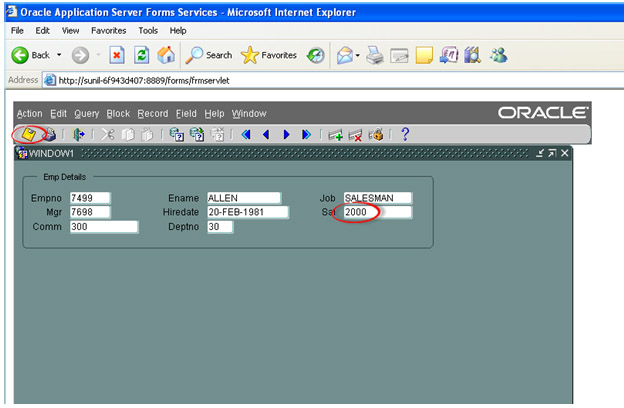
To change the salary of ALLEN from 1600 to 2000.
Go to ALLEN record, change the value of sal field to 2000.
Click on save button.
To delete the row of empno 111, traverse the record, click on delete button and save.
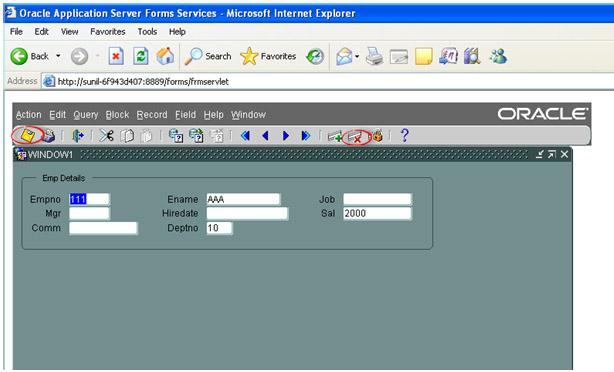
Look at the EMP table , empno 111 is deleted.
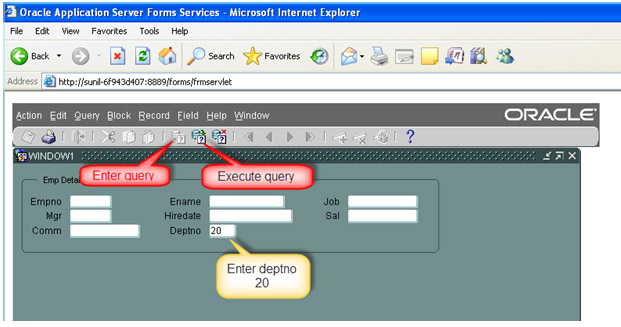
To see the details of all the employees working in deptno 20.
Click on Enter query
Enter deptno 20
Click on Execute query
Now, when you click on next record, you will get only the records working in deptno 20.
Assignment
Create a table rail_reservation, with the following columns
Train_no, coach_id, seat_no, doj, pname, age, gender, from_stn, to_stn, timing, ticked_id, fare
Create FORM using rail_reservation table.
Perform the following actions
- Add new reservations
- Change Date of Journey
- Cancel ticket. ( Remove )
- See the passenger details of particular train/ doj / to_stn